

Have you ever looked at a snake and wondered about the amazing structure beneath its scales? The snake skeleton is truly a marvel of natural engineering, allowing these creatures to glide, constrict, and climb with incredible grace. For many, like myself, discovering the intricate bone work of a snake can spark a fascinating project, turning something found into a captivating piece of natural art. It’s a rewarding pursuit, too it's almost, that combines patience with a keen interest in anatomy.
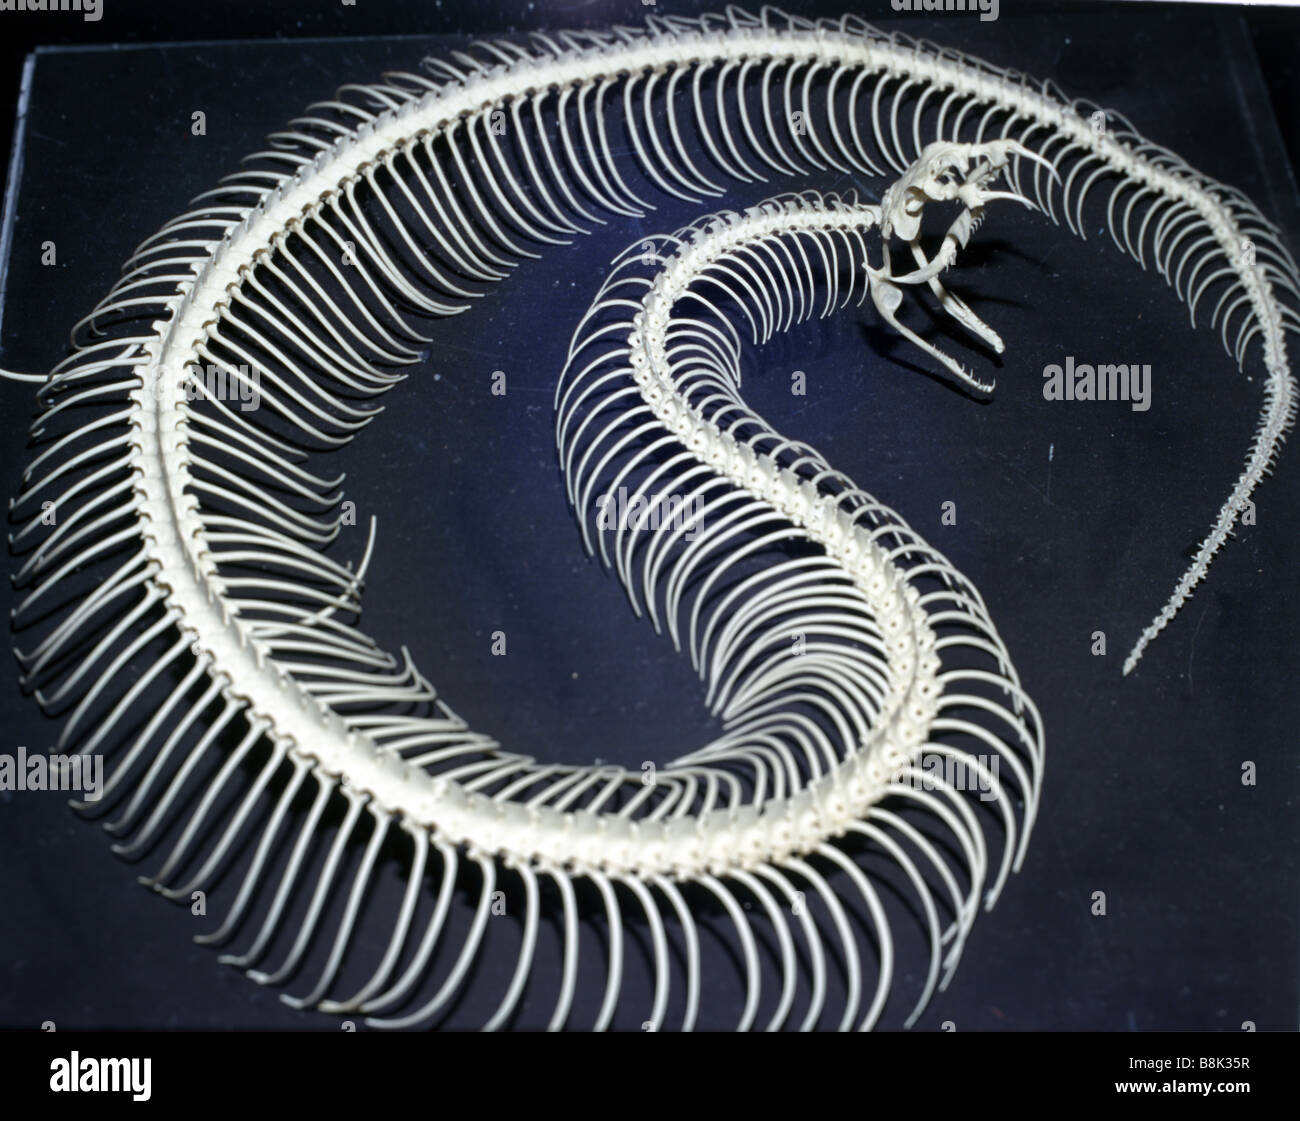
This whole idea started for me when I thought it might be a fun project to try and mount a snake skeleton. The vision was pretty clear: an elegant 's' shape, hanging vertically, showcasing every delicate bone. It's a hands-on adventure, you know, a chance to really connect with the natural world in a unique way.
If you're curious about how to preserve and put together one of these amazing skeletal displays, you've come to the right place. We'll chat about finding your specimen, the tricky bits of cleaning, and how to bring your vision of a mounted snake skeleton to life, basically. So, let's explore the hidden beauty of these slithery friends.
Table of Contents
- The Marvel of a Snake Skeleton
- Your Snake Skeleton Project: From Discovery to Display
- Bringing Your Snake Skeleton to Life: Articulation & Mounting
- Frequently Asked Questions About Snake Skeletons
The Marvel of a Snake Skeleton
When you think about a snake, you probably picture its fluid movement, right? That amazing ability comes directly from its incredible internal framework, the snake skeleton. It’s a very specialized structure, unlike almost any other creature, allowing for that unique slithering and coiling. You know, it's quite something to see up close.
Unique Bone Structure: Vertebrae, Ribs, Skull
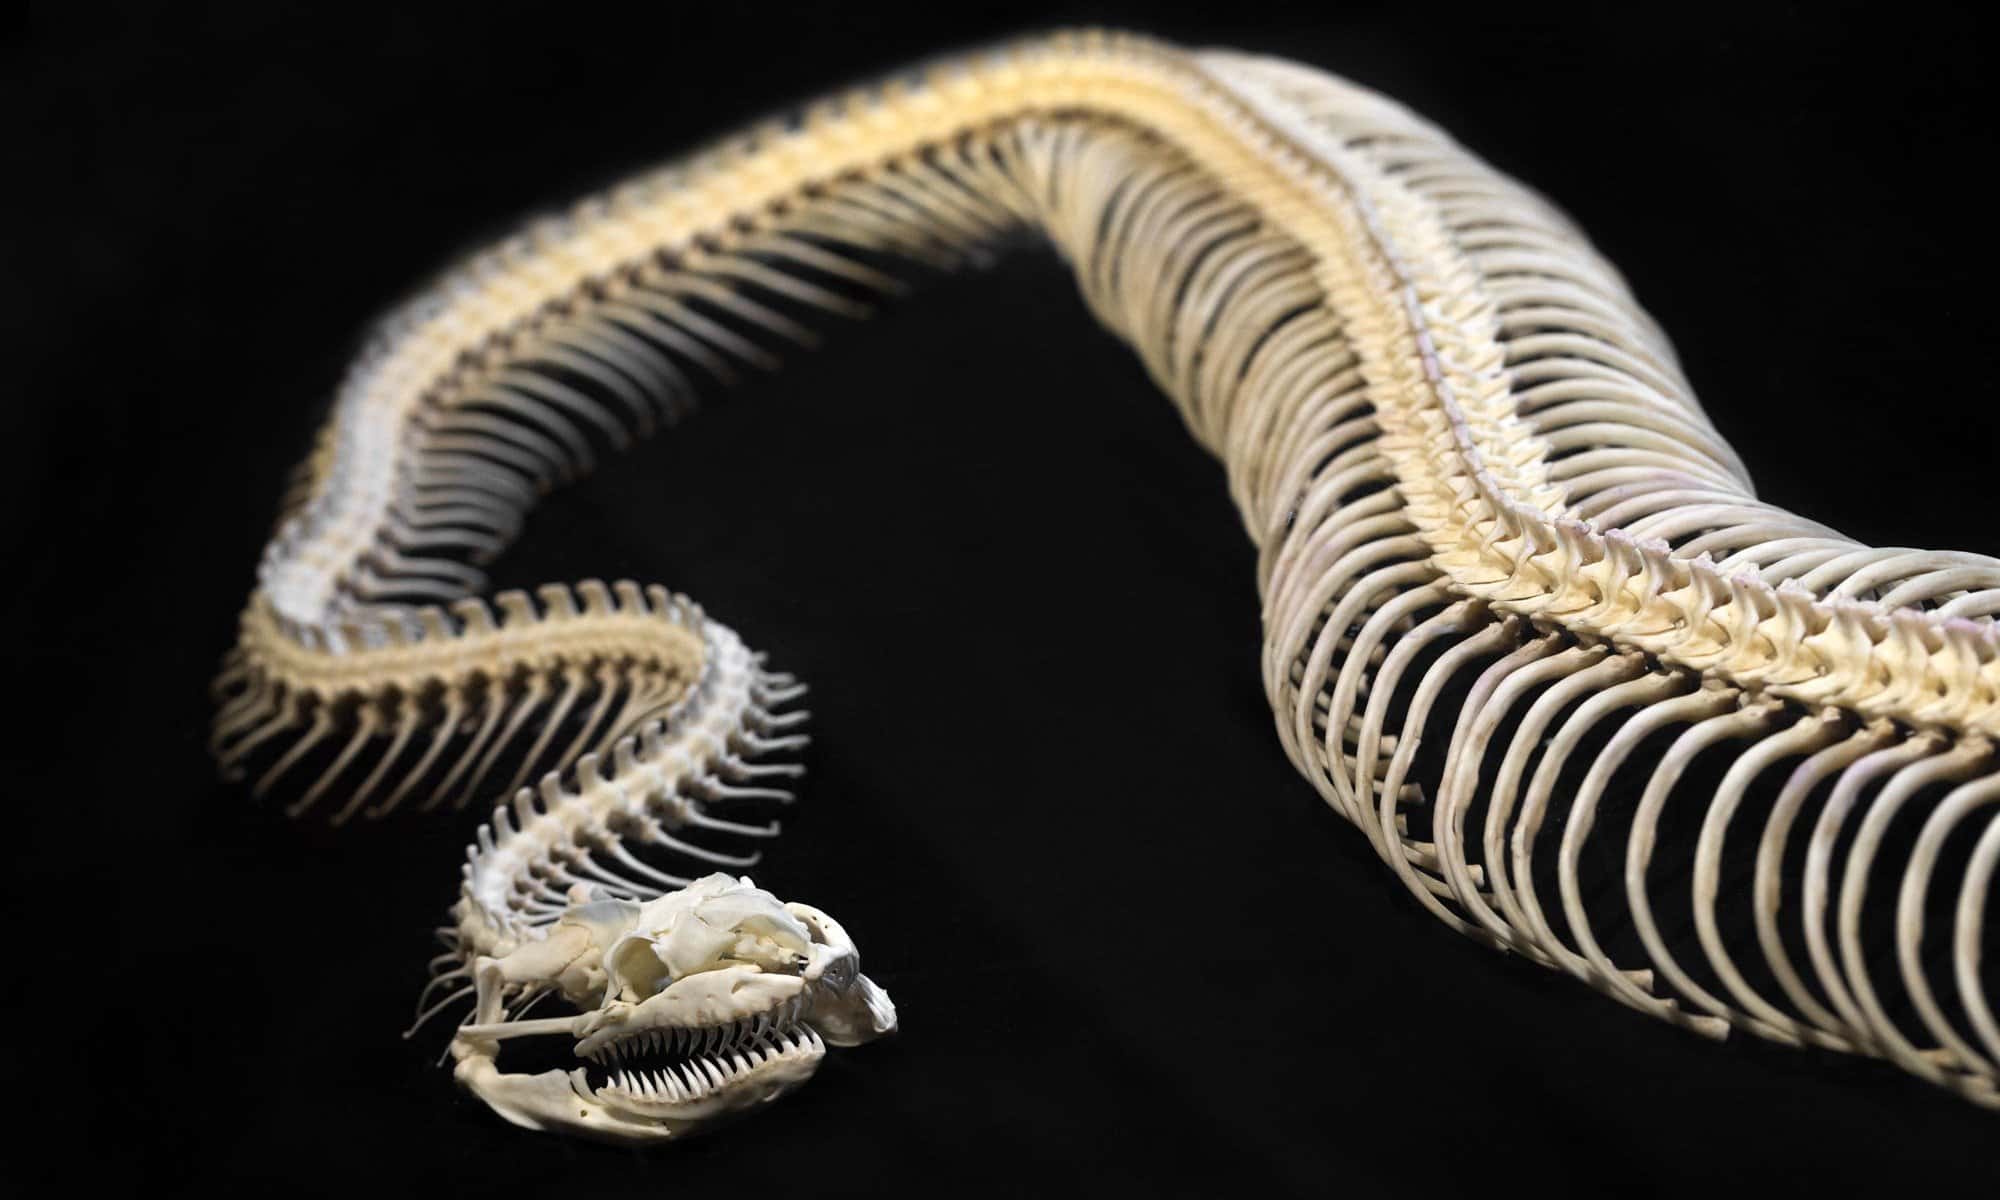
A snake's body is pretty much a long chain of bones, primarily made up of a huge number of vertebrae and ribs. Unlike many animals, snakes don't have a breastbone or sternum to connect their ribs, which is why they can expand their bodies so much to swallow large meals. Each vertebra, too, is designed to link up with the next in a way that provides both strength and incredible flexibility. This setup, you see, is key to their movement.
The skull of a snake is also a fascinating piece of engineering. Many snakes have a skull that can actually dislocate its jaw, allowing them to open their mouths incredibly wide. This is why they can eat prey much larger than their own head. It’s a bit of a clever trick of nature, honestly, and a truly effective one for their survival.
What Makes a Snake's Spine So Special?
The spine, or vertebral column, is the backbone of the snake skeleton, literally. It's made up of hundreds of individual vertebrae, sometimes over 400 in longer species. Each vertebra has a pair of ribs attached, except for the tail vertebrae. This design gives the snake an amazing range of motion, letting it bend and twist in nearly every direction. It’s what makes them such efficient hunters and movers, you know, allowing them to navigate all sorts of terrains. This long, flexible spine is pretty much the secret to their slithering success.
Your Snake Skeleton Project: From Discovery to Display
So, you're ready to start your own snake skeleton project? It's a truly hands-on experience, and a bit of a learning curve, especially when you first get into it. There are a few steps to think about, from finding your specimen to getting it ready for its grand display. It's a rewarding process, though, and quite a personal one, in a way.
Finding Your Specimen: Roadkill and Ethical Sourcing
For many hobbyists, the journey begins with finding a specimen. I, for instance, found a roadkill snake, which happened to be a local relative of the rattlesnake. Using roadkill is a common and ethical way to acquire specimens, as it means you're not harming a living creature for your project. You might also find snakes that have passed away naturally. It’s about respecting nature, you know, and making use of what's already available. Always check local regulations, though, as some species might be protected.
Initial Steps: Handling and Preparation
Once you have your specimen, initial handling is important. For a snake, you'll want to grab it right behind the head and then grab the tail with your other hand to keep it under control, even if it's no longer alive. This helps prevent damage to the body and keeps things tidy. I kept the entire skeleton and head for cleaning at a later time, which is a good approach. It's about being careful and thoughtful with the specimen, really, setting yourself up for success later on.
Cleaning the Bones: Skinning and Fleshing Challenges
This part can be quite a bit of work, honestly. I am having difficulty removing the skin and scales from the snake, and I've found that skinning was tougher along the spine, maybe because of freezer burn. Fleshing, which is removing all the soft tissue, was more work than I had seen before on other projects. It takes patience, you know, and a steady hand. I followed instructions online and defleshed it, then soaked it, which is a common method. This step is pretty crucial for getting clean bones.
The Beetle Brigade Versus DIY Methods
One question that comes up often is whether you need to skin the snake or if beetles will eat the skin. Dermestid beetles are amazing little cleaners; they can pick bones perfectly clean, leaving the skeleton intact. If you have access to a beetle colony, they can do a fantastic job, often eating the skin right along with the flesh. If you don't have beetles, you'll definitely need to skin the snake yourself, which can be a bit messy, as I learned. There's also the question of tanning the skin if you decide to skin it, which is a whole other project, you see.
Getting the Head Just Right
The head of the snake skeleton is often the most intricate part, and getting it clean without losing tiny bones can be tricky. After defleshing, one technique I learned was to use a 3cc syringe and a 22ga needle with rubbing alcohol, then gently roll the head. This helps to clean out any remaining tissue in those small crevices. It’s a delicate process, really, but vital for a complete and beautiful skull. You want to make sure every tiny bone is perfect, especially for articulation.
Bringing Your Snake Skeleton to Life: Articulation & Mounting
Once your snake skeleton is clean and dry, the real fun begins: putting it all back together! This is where your vision truly comes to life. It’s a bit like solving a very intricate puzzle, you know, piece by piece.
Planning Your Display: The "S" Shape Vision
I'm thinking of mounting my snake skeleton in an 's' shape, hanging vertically. This pose really captures the essence of a snake's movement and looks quite striking on display. Planning your pose ahead of time is pretty important. You might want to sketch it out or look at pictures of live snakes to get inspiration. I have a couple of good striking pictures in my snake picture file, for instance, that really help with ideas. It's about giving the skeleton a sense of life, really, even though it's just bones.
Securing the Vertebrae: Tiny Screws and Patience
Putting the hundreds of vertebrae back in order and securing them is where patience truly pays off. For my 's' shape, I'm thinking of putting some super long, thin screws in the plaque on the horizontal sections and having the vertebrae rest on them. This way, the natural curve is supported, and the individual bones stay in place without needing to glue every single one. Assuming I ever get the little sucker put back together again, I'm wondering how to best keep it all stable. It’s a delicate balance, you see, between support and showing off the natural form.
Reattaching Loose Ribs and Other Bits
During the cleaning process, some parts might come loose. For example, when the first rib got loose and fell off, I carefully removed it, knowing I'd reattach it later. Keeping track of all the tiny ribs and making sure they go back in their correct spots can be a bit of a challenge, but it's totally doable with a bit of care. Small dabs of glue or even tiny wires can help secure them. It's about attention to detail, honestly, making sure every piece is where it should be.
Creative Mounts: Open Mouth, Striking Poses
Beyond the simple 's' curve, you can get really creative with your snake skeleton mount. An open mouth snake with the tongue protruding makes for the most carnival of mounts, in my opinion, adding a lot of character and drama. You could even pose it as if it's striking or coiled, using wires or a clear acrylic stand for support. The possibilities are pretty much endless, limited only by your imagination and the skeleton's natural flexibility. It's your chance to truly make it a unique piece, you know, a real conversation starter.
Frequently Asked Questions About Snake Skeletons
How many bones are in a snake's body?
The number of bones in a snake's body can vary quite a bit depending on the species and its length, but typically, a snake has anywhere from 200 to over 400 vertebrae. Each vertebra usually has a pair of ribs attached, except for the tail bones. So, a snake can have hundreds of ribs, making for a truly flexible and complex skeleton, honestly.
Can you clean a snake skeleton at home?
Yes, you absolutely can clean a snake skeleton at home, though it requires patience and some specific methods. Many people use techniques like maceration (soaking in water to allow bacteria to consume soft tissues), or using dermestid beetles if they have access to a colony. It's a project that takes time, you know, but it's very rewarding when you see the clean bones.
What's the best way to remove skin from a snake for skeleton preparation?
Removing the skin from a snake for skeleton preparation can be tricky, especially along the spine, as I've experienced. It’s often best to make an incision along the belly and carefully peel the skin back. You might find it easier if the snake isn't too "freezer-burned," as that can make the skin stick more. Some people prefer to let beetles do the work, as they will eat the skin too, but if you're skinning it yourself, a sharp blade and gentle pulling are key, really.
Any other help with a snake skeleton project would be greatly appreciated, you know, as we all learn from each other. Exploring the intricacies of a snake skeleton is a truly rewarding endeavor, offering a unique glimpse into the natural world. Whether you're carefully removing a loose rib or planning that perfect 's' curve for display, each step brings you closer to appreciating the amazing design of these creatures. Learn more about animal anatomy on our site, and if you're curious about other fascinating creatures, you can also link to this page here for more insights. It’s a journey of discovery, honestly, and one that never really ends.

Detail Author:
- Name : Dr. Jamir Dickinson Jr.
- Username : reymundo.kozey
- Email : jaylen05@hotmail.com
- Birthdate : 1998-01-19
- Address : 5277 Treutel Ports Suite 816 Port Brandoberg, AZ 04393-0113
- Phone : 510.700.5191
- Company : Huels, Kris and Satterfield
- Job : Scanner Operator
- Bio : Aliquam eum rem voluptatem repudiandae. Ullam enim porro possimus asperiores qui. Magnam est sapiente vel sed corporis. Ea ratione excepturi qui illum sit tempora veniam.
Socials
instagram:
- url : https://instagram.com/rveum
- username : rveum
- bio : Consequuntur consectetur assumenda corporis in. Sapiente facere illo error autem doloremque in.
- followers : 6451
- following : 236
twitter:
- url : https://twitter.com/rveum
- username : rveum
- bio : Voluptatem aperiam odit et amet at magnam. Quod quasi blanditiis perferendis. Incidunt ipsum repellendus eligendi inventore. Totam laboriosam mollitia vel sit.
- followers : 919
- following : 2309
facebook:
- url : https://facebook.com/roy.veum
- username : roy.veum
- bio : Accusantium eos doloribus nisi pariatur perferendis dolorum nihil.
- followers : 1691
- following : 2324


 Bonus
Bonus